
How do you hang punctuation outside the text box in Quark? Here’s how you do it: If you are using display type (larger point sizes) you will want to take the time to tighten up the space between letters. As type size gets bigger, the spacing tends to look a little loose. You can make the change in the measurement pallet or with a keyboard command. Highlight your type with the curser. Hold down command, option and shift and use the end bracket — [, you will find this next to the “p” — to tighten the tracking. Tracking is the adjusting of space between three or more consecutive characters. Now go back and see if there are any letters that look too close or too far apart and adjust the kerning. Kerning is the adjusting of space between two letters. Many times with a letter such as “W” with an undercut, especially when next to a round letter such as “e,” we like to pull them in to make all the type look consistently spaced. We are trying to achieve a nice rhythm with the type. Simply place your cursor between the two letters and use the same command that you used for the tracking to tighten — [ — and to loosen — ]. Now, you’re ready to hang the punctuation. There are many ways to do this. This is just one example. 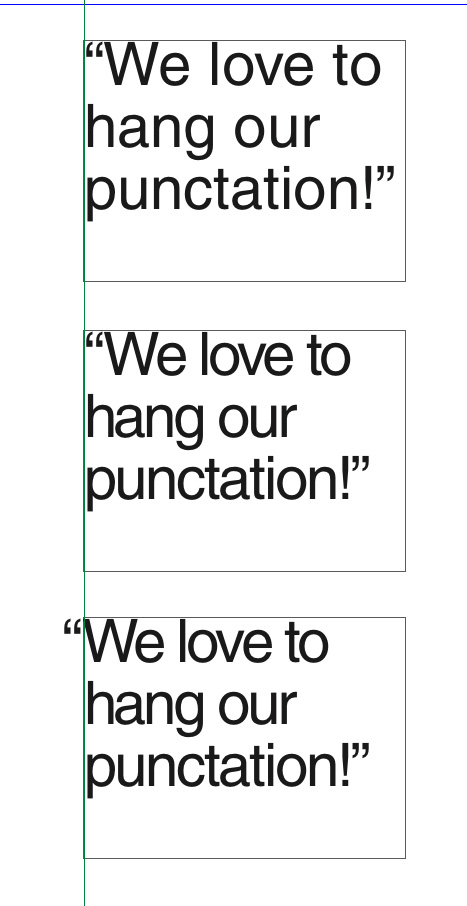 1. Take a look at the quotation mark. Usually the size needs to be reduced. Then use baseline shift (under the style menu) to bring the quotation mark back up even with the cap height of the other letters. 2. Now, add a space before the first quotation mark. 3. Place your cursor between the space you just added and the quotation mark. Basically, you are going to kern until the punctuation hangs out over the edge of the box. Kerning is always the relationship between two letters, which is why you need to add the space. The space will allow the kerning. 4. Hold down command and shift while you adjust the kerning with [. By holding command and shift, you can move in increments of 10. 5. If you have an older version of Quark, you may see that the quotation mark is disappearing as it moves out of the box, but it’s not. It will print. With newer versions, you will see the quotation mark beyond the edge of the box. There you have it. This technique will also work for hanging drop caps or ding bat characters. Do you have another way to hang? Drop us a note to let us know how you do it.

Hanging punctuation in Quark XPress
April 19, 2009

About Lennis
Leave a Reply
What is the PsPrint Blog??
The PsPrint Blog is a resource for graphic designers, freelancers, small business owners and fans of print marketing. You'll find helpful techniques on printing everything there is to print, including business cards, postcards, brochures, stickers, invitations, greeting cards, door hangers, magnets and more. The PsPrint Blog shares creative ways to improve your design and layout skills, and useful tips for marketing your business in any medium. We also like to have a little fun, sharing design inspiration and spotlighting some our favorite customers' printed pieces in our "Hot Off the Press" series.


Hi there,
I recommend you check out QuarkXPress 8. Rather than clucky workarounds, QuarkXPress 8 has hanging punctuation and hangling dropcaps built right into the application with predefined settings as well as the ability to customise it to your hearts content. It's as easy as selecting it from the drop down menu. Check out http://8.quark.com/designer-driven_typography.html for more details.
Paul thanks so much. You are absolutely right. This is a greatly improved method. Are there any other tips you'd like to share?