For those designers switching from QuarkXPress to Adobe InDesign there is a bit of a learning curve and changes in terminology to get used to. One of the items that took me a little while to adapt to was calling what I knew as a runaround in QuarkXPress, a text wrap in InDesign. Honestly I still say runaround every once in awhile, but at least I know that in the InDesign menu options I need to look for the term text wrap. There are a few other new terms to get used to as well, so here is a little QuarkXPress-to-Adobe InDesign translation chart: Runaround = Text Wrap Text Box = Text Frame Item = Object Get Text = Place While the terminology is different, the concepts are pretty much the same. The other thing Quark users need to adjust to with InDesign is working with pallets instead of dialog windows. In this tutorial we will go through a text wrap step-by-step in InDesign. Step 1 – Select the object you would like to wrap 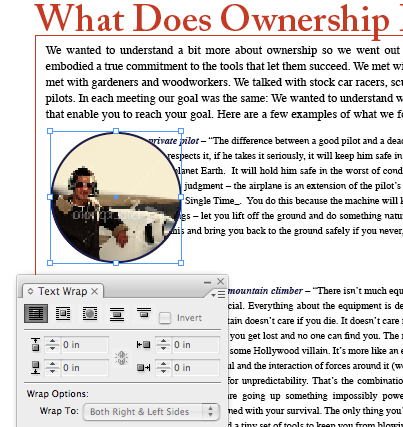 Select the object you would like to wrap just like you would do in Quark. Then take a look at your text wrap pallet (Window Menu>Text Wrap). You will notice there are five icon buttons at the top of the pallet to select what kind of wrap you would like to place on your object. The default is to have no wrap, which is the first icon button on the very left. Step 2 – Choose your wrap The first wrap choice (second button from the left) is the wrap around bounding box button, which will do exactly what it states and wrap all four sides of the bounding box as seen in the example below.
 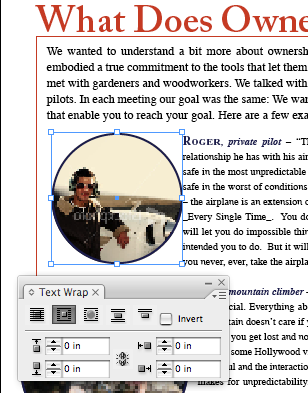 You may notice our example has a picture within a round shape. If you wish to have the text follow that shape you would select the second wrap (third button from the left), the wrap around object shape. Now, perhaps our image is going to be in the middle of text but we only want it to wrap on the top and bottom or just the top of the image. That is where the last two buttons would be used, jump object and jump to next column. For the sake of this example we will be wrapping our text around our object shape. Step 3 – Give your object some breathing room
 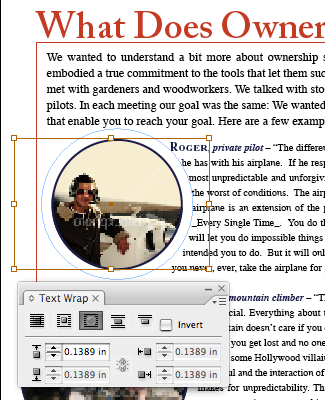 Now that you’ve chosen to wrap your object you can type in your exact offsets for the top, left, bottom and right sides of your object (if you are using the wrap around bounding box, when using wrap around object shape it treats all sides equally) to move the type away from the bounding box. Or just use the up and down arrows next to each offset to increase or decrease the amount in 1/16-inch increments. That’s really all there is to it, but there are some different options we will review next. Wrapping objects with masks or clipping paths What if your object isn’t in a specific shape frame and has a mask or clipping path applied? The wonderful news is that InDesign can detect this and all you have to do is tell it to use it. Under your text wrap pallet select show options (see example below).
 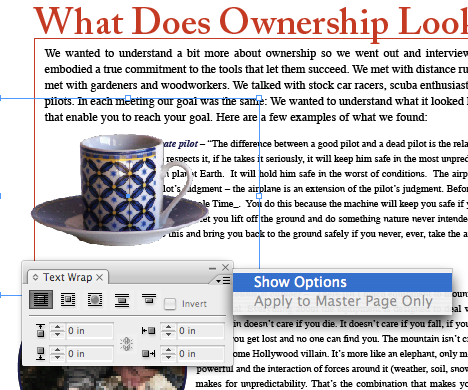 You will notice a drop-down menu labeled wrap to under your wrap options. Here you will be able to see if your image has a quick mask/alpha channel or Photoshop path applied to it that you can instruct your wrap to follow. Only the options available will show in black text.
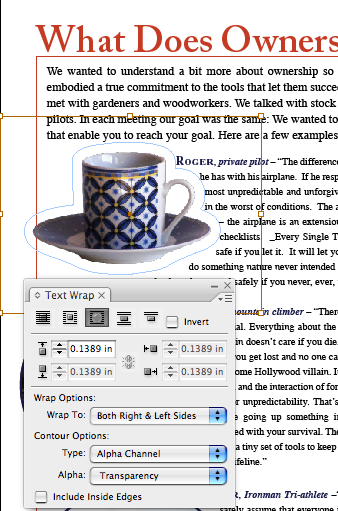
 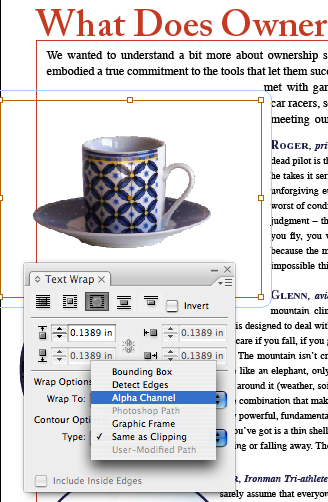 After selecting alpha channel you can see how the wrap follows the contours of the object.
  Object layer placement with text wrap doesn’t matter in InDesign This used to really bother me about Quark. You have to worry about if the text frame was behind or in front of the object to wrap or not wrap the text around the object. That’s not how it works in InDesign. Text within a frame will wrap an object no matter what its level is in the layers. If you don’t want a particular text frame to wrap no matter what object is around it then select the text frame, go to Object menu > Text Frame Options and select Ignore Text Wrap. This tutorial is not exhaustive of all the text wrap options so designers if there is something about text wraps that you feel is important to know in InDesign please share in the comments. Happy wrapping!
How to create text wraps, a.k.a. runaround, in Adobe InDesign
March 25, 2009
Figuring printer spreads for saddle-stitched documentsPrint marketing: 7 benefits to leverage in your business





[...] ten minutes only. I hope, you will enjoy it with a new edge of learning. Here’s another easy text tutorial using Adobe [...]