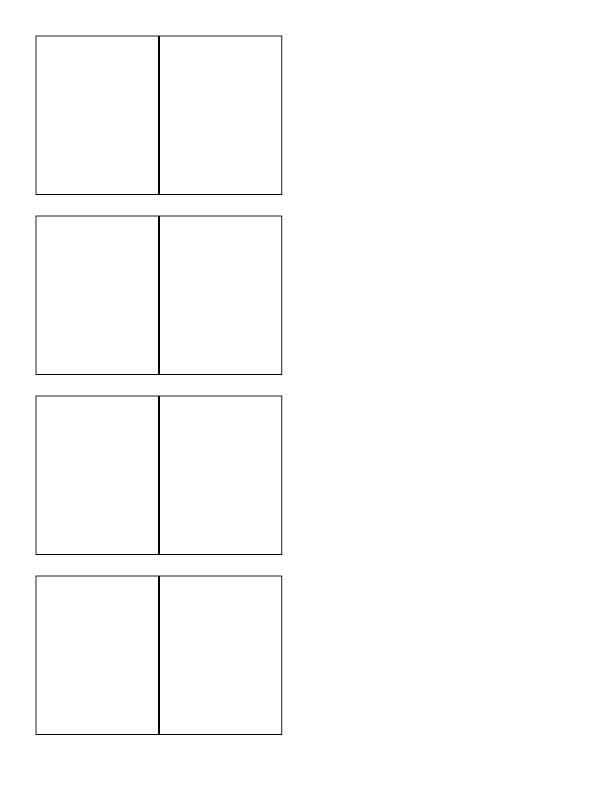
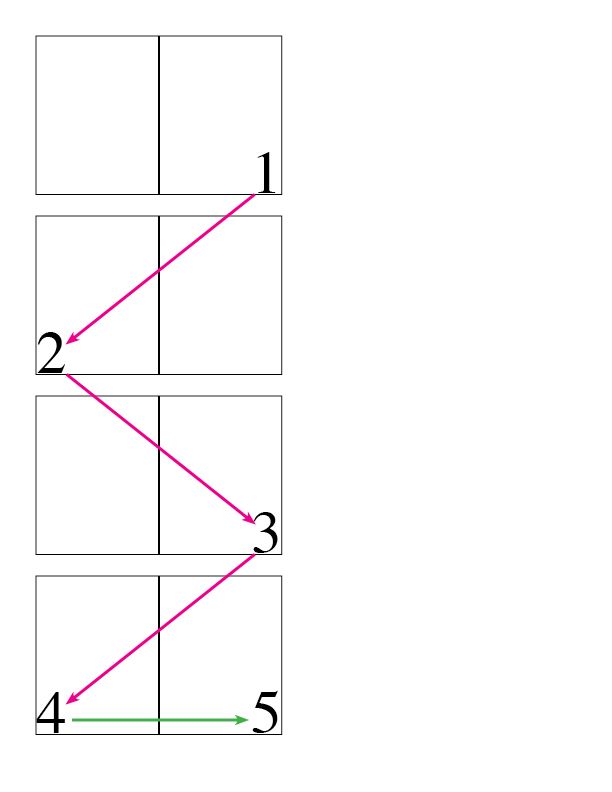
Years ago, before Adobe InDesign existed, I used QuarkXPress. At the time, my job required me to transform my readers’ spread designs into printer spreads when going to press. Unless you are used to turning multiple-page documents into printer spreads on a daily basis it can be confusing. I came up with a little trick to make sure I was putting the proper pages together. Step 1 – Draw on a piece of paper, or draw using your computer, the number of spreads that will be in your completed document. For this example we have an eight-page brochure, so we have a total of four spreads. TIP: For those of you new to saddle-stitched documents, you must work in four-page increments, because each sheet of paper that creates your spread is equal to four pages.  Step 2 – Start with the right side (or cover) of the first spread and label it No. 1. Follow in a zigzag pattern to the left page of the next spread and label that one No. 2, keep this zigzag numbering pattern until you get to the bottom (or center spread), then go directly across from left to right.
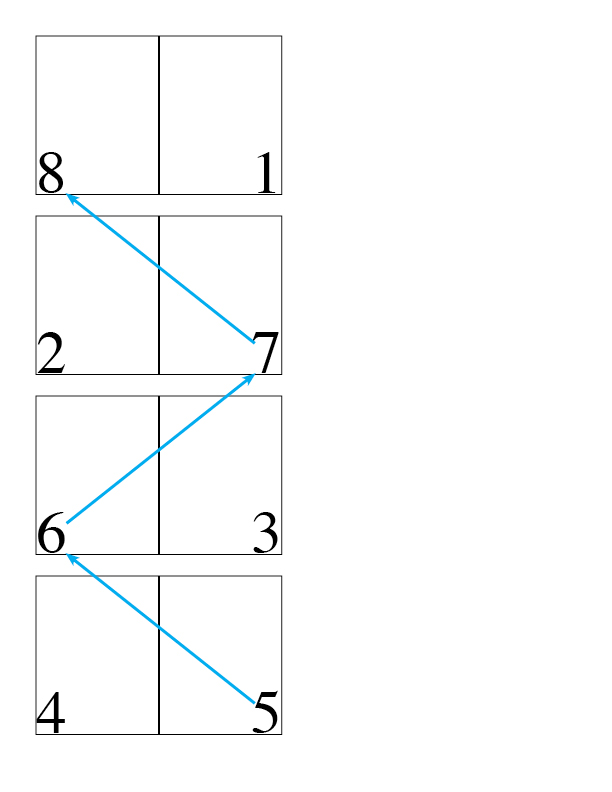
  Step 3 – Return back up the page ladder in the same zigzag number pattern until you get back to the top with your last page (or back cover).
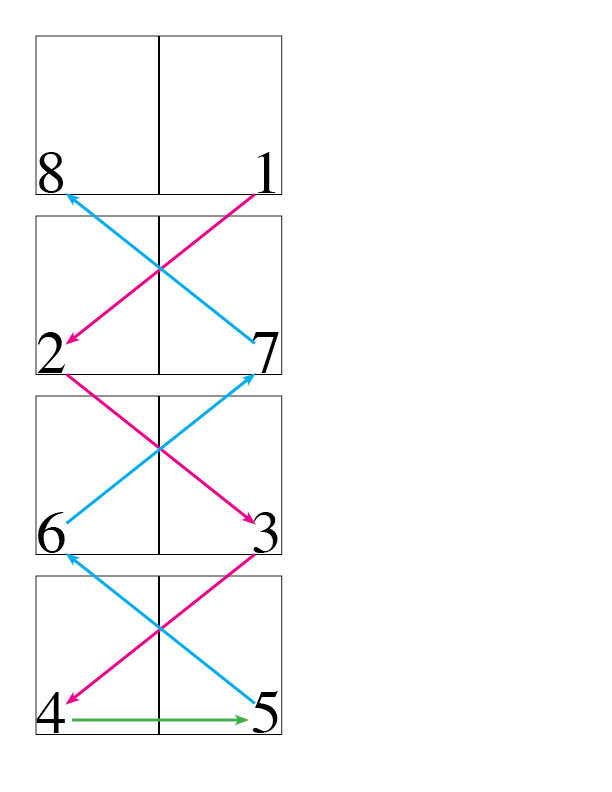
  Step 4 – Here is the total pattern top to bottom and bottom to top right to left. Arrange your pages and save it as a separate document.
  You’re in luck if you own InDesign If you are the proud owner of the latest Adobe Design or Master Creative Suite collection, then you have InDesign. This means you don’t even have to worry about manually arranging your reader spreads into printer spreads, because InDesign has a feature that will do it for you automatically; however, InDesign refers to printer spreads as imposition. While imposing pages, you can change settings to adjust spacing between pages, margins, bleed and creep. Be sure to contact your printer for these specific settings. The layout of your document is not affected, because InDesign handles the imposition in the print stream. No pages are shuffled or rotated in your document. If you need to send your printer a PDF file, just make sure you are printing to the Adobe PDF driver. Here are the steps to impose your InDesign document:
- Choose File > Print Booklet.
- If a printer preset has the settings you want, choose it in the Print Preset menu. To use the print settings (as they appear in the Print dialog box) of the current document, choose Current Document Settings from the Print Preset menu.
- If you don’t want the entire document to be imposed, select Range in the Setup area and specify which pages to include in the imposition.
- Use hyphens to separate consecutive page numbers and commas for nonadjacent page numbers. For example, typing 3-7, 16 imposes pages 3 through 7 and 16. Note: If you have divided the document into sections of page numbers, you should enter section page numbers (such as Sec2:11) in the Range field.
- To change settings such as printer’s marks and color output, click Print Settings. Using the options on the left, change settings as needed, and then click OK.
In the Print Booklet dialog box, specify other booklet setup options as appropriate, and then click Print. Whether it’s a simple eight-page brochure or a more complex 100-page annual report, knowing how to create manually or through your design software printer spreads is invaluable. Your printers pre-press department will thank you for the forethought.


[...] I found a great link that explains “Printers Spreads”. Read more about it by clicking here. [...]
Superb reading and great information on designing. Really good work.