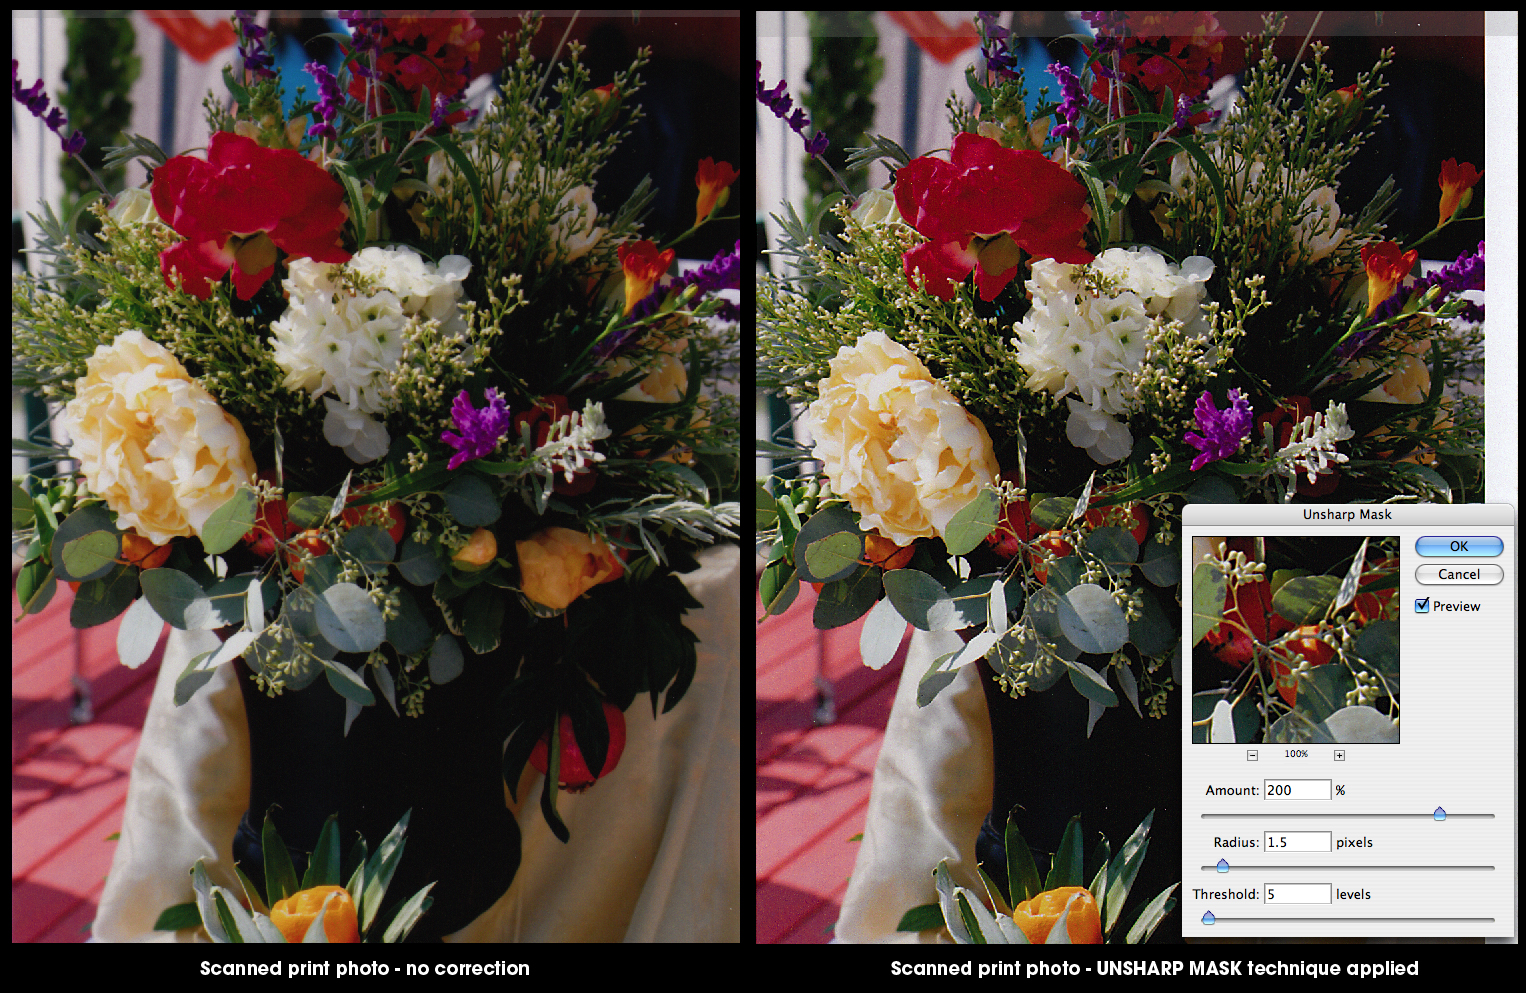
Everyone hates bad photos, especially soft or fuzzy photos. They stand out like a sore thumb when printed, especially if it’s used in an ad that could be right next to a competitor’s ad with flashy studio photography. Here are a few guidelines on making scanned or not-so-great photos worthy of being printed. Key points: • Never use the Sharpen or Sharpen More filter on color photos. • Use only the Unsharp Mask filter. • Always apply sharpening as the last process after you’ve done any sort of color correction. • Preview sharpening effects only at actual pixels or 100 percent. • For offset printing slightly over-sharpen to compensate. The key parameter in obtaining good results from Unsharp Mask is the Radius setting. The Radius needs to match the image content. It controls the width of the sharpening halo in a somewhat indirect way. Entering a Radius of 1 doesn’t produce a one-pixel halo; it just tells Photoshop to “look” one pixel outward as it evaluates each pixel for sharpening. That said, a large Radius setting produces a larger halo than a small Radius setting. Next, set the Amount. Amount is the “volume control” for Unsharp Mask. It dictates the strength of the sharpening. A small Radius setting will need a higher Amount than a large Radius to produce the same degree of visual sharpness. Last, set the Threshold. The Threshold control is basically a noise-reduction setting. It tells Photoshop to ignore a certain amount of difference between pixels when sharpening, and allows you to avoid over-sharpening lightly textured areas such as skin tones. Balance the settings The procedure I recommend is to start with an Amount setting in the 200 percent to 300 percent range and a Threshold of zero and work the Radius setting until it matches the image content. Then adjust the Amount setting until the desired degree of sharpening is obtained. Finally, if necessary, increase the Threshold to smooth out over-sharpened areas of texture.

Here is an example of a print photo scanned and then applying the sharpening guidelines as outlined above. No color correction was done but just by sharpening the photo properly the colors appear brighter. Happy Unsharp Masking!


No comments yet.